
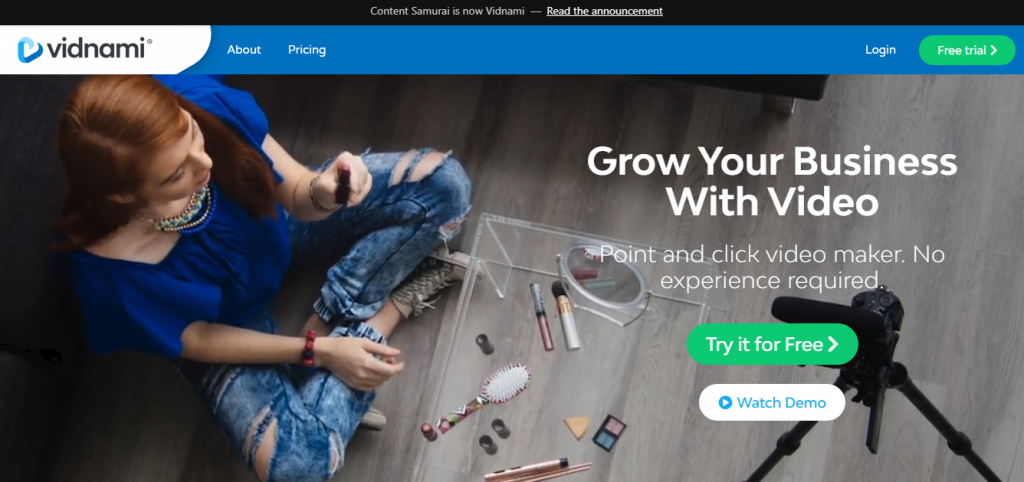
Vidnami (formerly named Content Samurai, more on that in a bit) promises that you can “Create Stunning Videos Fast” with their app. You can use Vidnami video creation software to turn articles, blog posts and shorter pieces of content into videos in minutes, or so the creators claim. I’ve spent a lot of money having freelancers create videos for me, so I figured I would give Vidnami a shot.
Before I get into the full review of the software, let’s talk about the product’s name change.
Are Vidnami and Content Samurai the Same Company?
What you may have known as Content Samurai has been rebranded and renamed. The new name of the company is the Vidnami. So, why the name change?
The creators of Content Samurai wanted the product’s name to better reflect that this is a video creation platform. Vidnami was created by combining the word “video” and the Japanese word for a wave, “nami”.
The idea is that the software can create a wave of traffic, sales and profitability for your business by letting you quickly and easily create stunning, engaging videos.
What Happens to All the Videos I Created with Content Samurai?
If you have videos you made with Content Samurai, they’ve been transferred to the Vidnami system. You can start using the new and improved software and pick up right where you left off. Just use the same email and password you registered with content samurai and log into the Vidnami website.
Is the Vidnami Management Team the Same or Has the Company Changed Hands?
Don’t worry. The same great team that brought you Content Samurai is still in place. Nothing has changed as far as the company is concerned. Improvements have been made and the Vidnami team will always looks to make the software better and easier to use in the future.
Now for My Honest Vidnami Review
I was excited to try this innovative software. The company claims it is “point-and-click” easy to create great videos.The monthly fee for a paid membership was within my budget, but I tried something else instead. The creators of this software will let you test-drive their product for 14 days without paying a penny.
Content Samurai offered a free 7-day trial. You get twice as long with the Vidnami, a full 14 days for free. That’s a nice upgrade.I love getting free trials on software, applications and courses before I spend any money, so I signed up. Here’s what I was pleasantly surprised to discover. Try the Free Vidnami Trial now.
What Is the Vidnami Free Trial?
A lot of online courses give you a trial period for free. That’s the case here. However, many programs or courses only give you a watered down version of the software. That is definitely not the case here.
And then there’s this.
During your free 14-day trial period you can create as many videos as you like.
That’s right, make as many videos as you can crank out. And here’s the great part. After that free trial period is over, even if you don’t pay the monthly fee for more Vidnami features, you get to keep every one of those videos.
This was a no-brainer decision maker for me. I got a full 14 days to decide whether I wanted to become a paying member. I made a few videos using the automatic text to video software and I must admit I was surprised.
The software quickly turns articles and other content into videos. It’s a simple process (I like that since I’m not the most tech-capable guy). More importantly, I got videos ranking high for my target keywords!
Those videos were only up on YouTube for a few minutes before they started ranking high in Google.
But I’m getting ahead of myself. Let me walk you through what happens when you sign up.
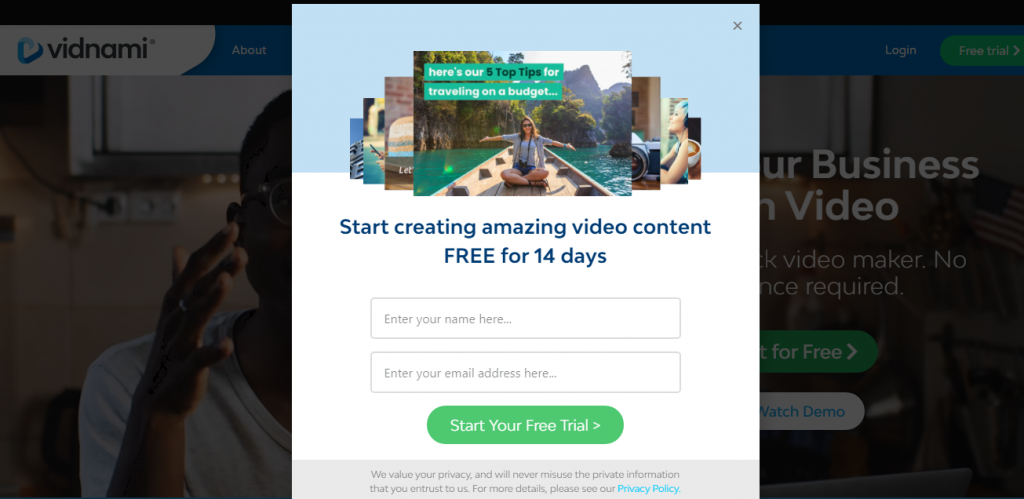
Signing Up – How to Use Vidnami
Sign up for free with your best email address. You don’t need to register a credit card, which I really like. You’re immediately taken to a “Welcome” video. You also receive a “Welcome” email.
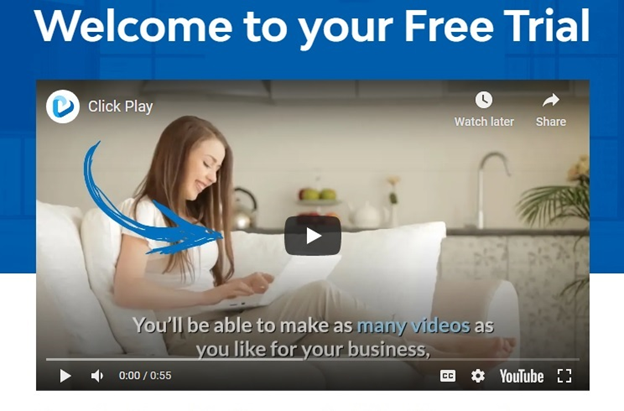
Don’t go to your email yet. Watch the video that pops up. (You can also click on “Watch later” if you don’t have the time right now.)
This welcome video explains that you can make an unlimited number of videos.You can keep them forever and use them however you like. You are told about the email you receive that contains step-by-step instructions and more video help introducing you to this automatic video maker software.
After the short video, head over to your email inbox. You receive a welcome from one of the software’s founders, Anthony Fernando. Click on the provided link to create a password and get started.
You’ll be taken to a page that looks like this.
I like that the video was short. You can stop the video whenever you like if you need to. You can also view this video directly from the Vidnami website, or watch it on YouTube.
It doesn’t matter if you have never created a video before. (I hadn’t.) Follow the how-to, step-by-step instructions and you can create a video in just a few minutes.
You’re told to click the blue “Create a New Video” button at the upper right corner of your dashboard. Then you go through a 4-step process.
The first step is easy. (They all are, actually.)
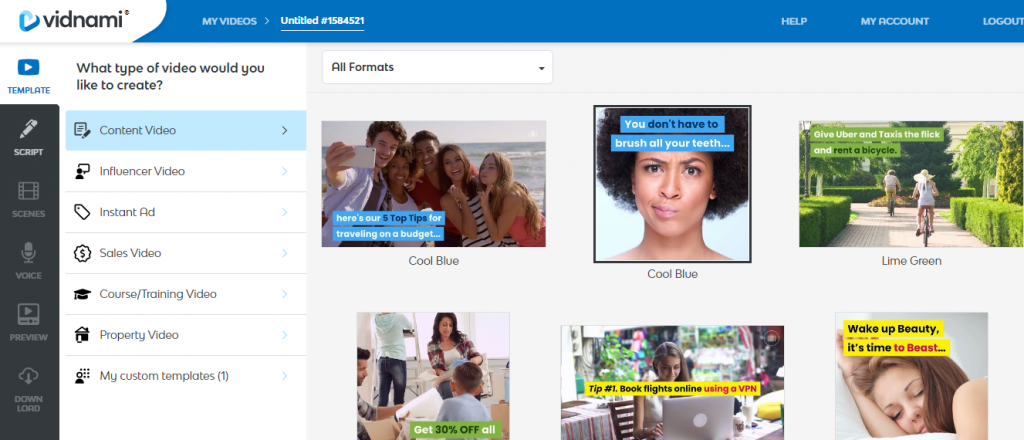
Step #1 – Browse the video templates and select one. Choose from the following options and grab the template you like.
- You can create a video for social media sites like Facebook and Twitter
- Make a video from an article or blog post
- Create a sales video
- Make videos for an online course
- Whip together a professional looking property listing video
The narrator chooses to create a social media video, then selects a template. Once you figure out what template you’re going to use, just click on the big button that says “Use This Template”.
Step #2 – You are taken to a “Script Screen”.
Here is where you add a title for your video. Then you enter the video script. You can type directly in the text box if you like. I wrote a video script in Word and simply copied and pasted it into the text box.
Step #3 – Click the “Create Scenes for Your Video” button in the bottom right-hand corner of the screen after you’ve added your script and video title. Here’s where you try your hand at becoming the next Steven Spielberg!
Don’t worry. This is super easy. I was a little intimidated going into this but the software makes it simple and it’s very easy to understand. Probably the part I liked the most is the fact that your video has already been created at this point!
Your video script is broken into 1-sentence scenes. When you’re adding your script, whatever you write in a paragraph is going to be what you see as the text for a scene in your video. Don’t worry. If this sounds confusing, you will instantly see what I’m talking about when you get to this step.
If you like how your video looks, you’re done! All you have to do is save the video and begin using it to build your business.
If you want to make changes, you can do that. To make changes, click on one or more of the 3 tabs at the top of the editing bar on the left of the screen. They are …
1 – Media
2 – Layouts
3 – Style
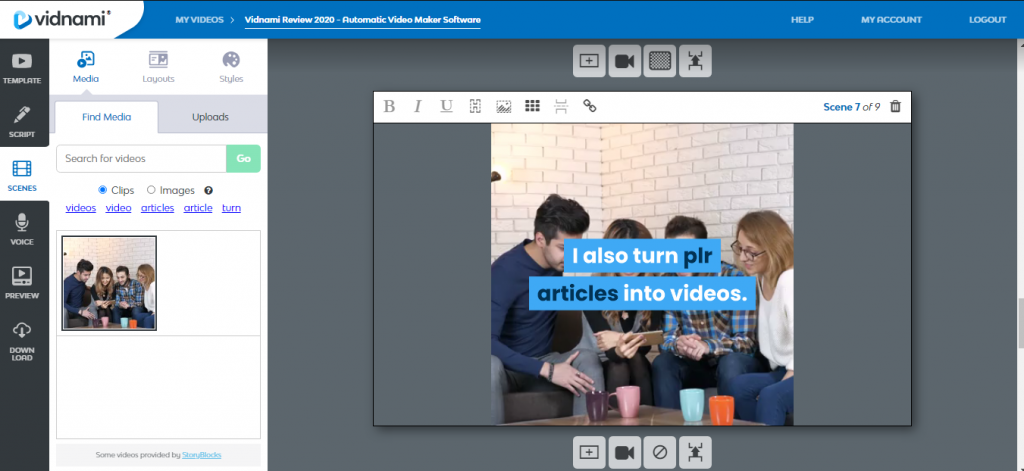
Click “Media” if you want to change the video in any scene. If you don’t have any great videos, don’t worry. Vidnami provides tons of videos for you to choose from … 480,000 video clips to be precise! (You can also choose from literally millions of high quality images if you prefer.)
Use the search feature to find a video that matches the text in your scene. If you would prefer to use an image rather than a video clip, you can do that.
This next feature is really amazing, at least to me. As you are creating scenes, the software will suggest keywords from your script. All you have to do is click on one of the keywords and you are instantly presented with videos and images related to that keyword.
This can really help you match your video to your script. You add the video or image to your scene simply by clicking on it.
Okay, you have the pictures or videos you want for all your scenes. You can change the position of your text by clicking on the “Layouts” button. Your scene is divided into 9 positional squares. Choose where you want your text to go, click on that square, and you’re done.
Make any edits you need to in every scene. When you’re ready to add narration to your videos move to the next step.
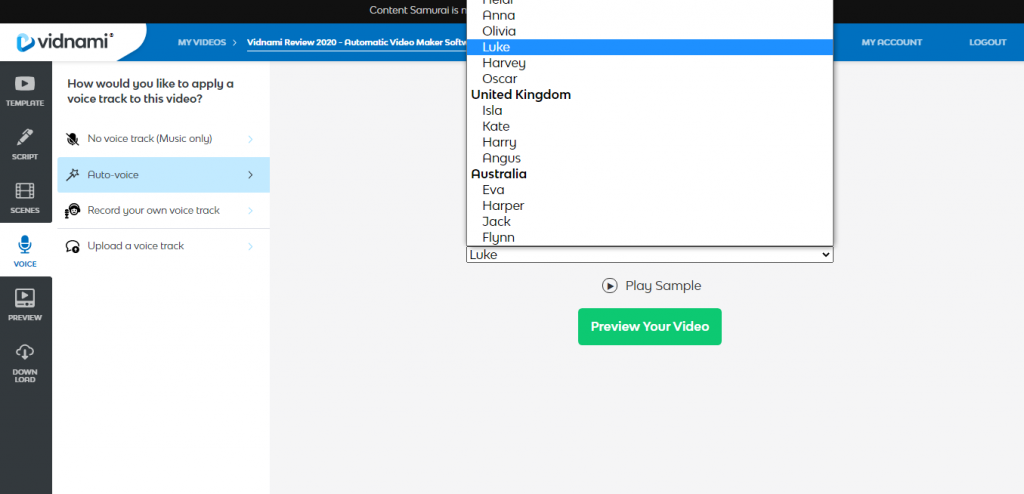
Step #4 – Adding a voice track, your own voice or music is as easy as clicking the button that says “Add Voice Track to Your Video”.
This option is located at the bottom of your scene editor. You have the following voice track options.
- Music Only
- Automated Voice
- Record Your Own Voice Track
- Upload a Voice Track
During this instructional video the “Music Only” option was chosen. There are plenty of how-to videos you have access to that will walk you through the other options here.
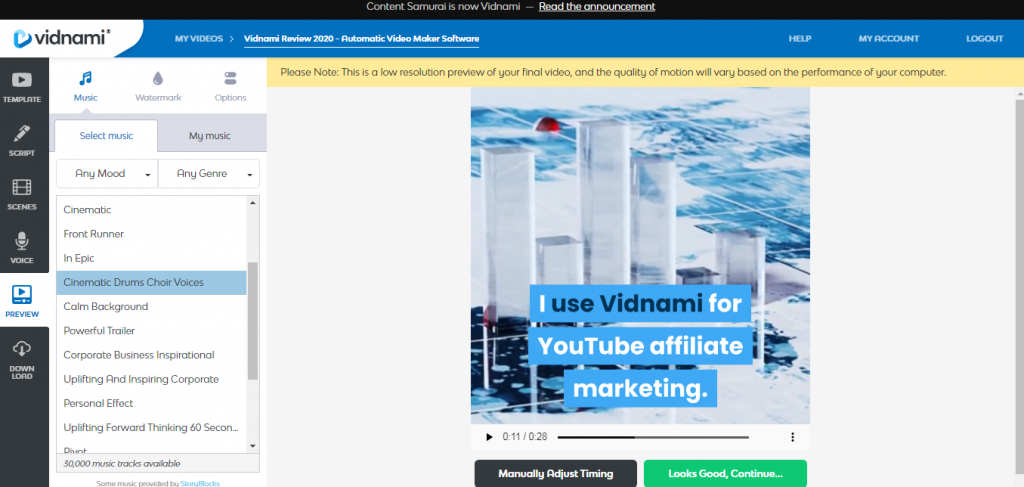
When you are first checking out the software, choose “Music Only” and then click the blue “Preview Your Video” button in the middle of the screen. You’ll be taken to a preview screen where a random music track has been chosen for you.
Click the “Play” button and preview your video. If you like what you see in here, congratulations … you have just made your first Vidnami video in only a few minutes.
On the editing bar on the left-hand side of your screen you can select different music provided with the software. You can also add your own music files. What is really awesome is you can manually adjust the timing of the music in your scene so you can get just the right effect.
When you’re happy with the music, click the blue “Looks Good Continue” button. Then select the “Generate” button on your next screen and you’re done.
When the software is finished, simply click on the “Download Your Video” button and use your videos wherever and however you like.
More Instructional Videos Are Provided If You Want to Do More
Look at the screenshot I attached above. I want you to look at the left sidebar. The #01 “Getting Started” video is what I just walked you through. You can see there are more video instructions. The videos are between 2 and 5 minutes long each, so it doesn’t take long at all to become acquainted with the software. The 5 additional training videos include the following topics.
#01 – Getting Started
#02 – Video Clips
#03 – Voice over Tracks
#04 – Branding Your Videos
#05 – Top 5 Ways
How to Start Using the Vidnami App

When you feel comfortable with the training you have received, you can start using the app on your own. Click the blue “Click Here to Start Using the App” button below the video player to get started.
You are taken to your dashboard. This will look familiar because it is exactly like the dashboard used in your training videos.
Before you click on the getting started button, scroll down the page. You’ll see “Help Center ” and “Community” options.
The “Help Center” should be pretty straightforward. Go here when you need help! This is where you’ll find training videos and troubleshooting guides. You also get shortcuts, tips and tricks for getting the most out of the software.
Select the “Community” button if you want other Vidnami subscribers to give you feedback on your videos. You will be taken to a private Facebook group. This is only for Vidnami users. There are also support team members, helpful video instruction and other benefits of joining this Facebook group.
Finally, whenever you are ready to make a video, just click the “Create a New Video” button at the top right of the screen when you log into your account.
Vidnami Pricing
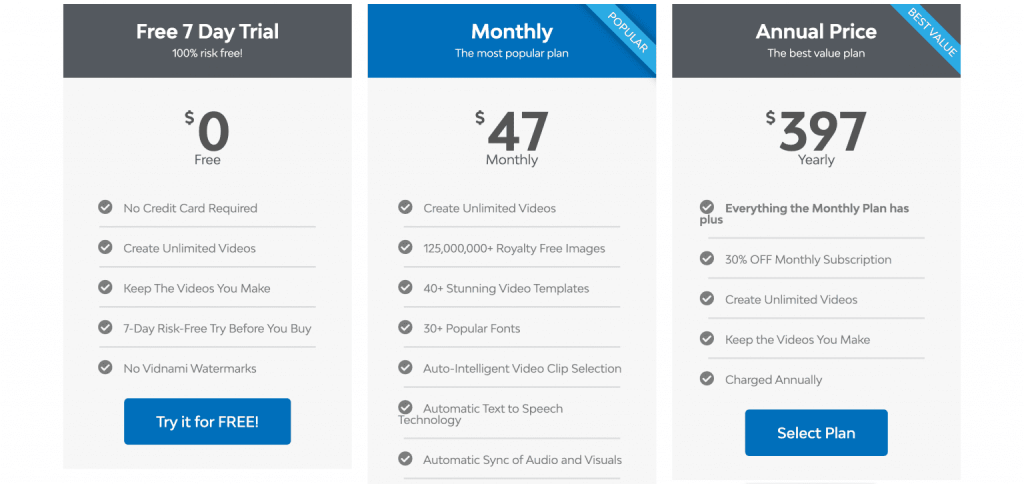
I mentioned the free 14-day trial. After that, how much does this articles to video software cost? During your trial period the company offers you to sign up as a paid member at a substantial discount. Log into your free account and look for a banner at the top of the page.
The current Vidnami cost is just $47 each month. But …
… the company is currently offering a 25% discount to new subscribers! That means just $35 per month. That saves you $144 per year for life.
(NOTE: Prices may change. If you like the discounted monthly fee I would recommend grabbing it now in case it goes up in the future.)
And there’s more.
The company knows because of the name change, it could be missing some potential customers. So it’s offering a big bonus package on top of the 25% membership discount.
Sign up today and you also get the Vidnami Video Marketing Bonus Pack for free (that’s more than $1365 in bonuses).
Here’s what you get.
- The bonus package includes the Storyblocks Video Clip Library valued at $468 per year. What does that mean? It gives you access to more than 790,000 premium video clips … absolutely free.
- The Storyblocks Music Tracks bonus is also included, a $180 value every year. This provides unlimited access to more than 30,000 music tracks.
- You get the Ultimate Video Traffic Blueprint guide. This has been used to drive more than 7 billion video views. It can drive tons of traffic to your site.
You also get …
- 5-Minute Facebook Ad Formula (You get 3 proven methods for quickly creating high converting video ads on Facebook.)
- 21 Ways to Find Clients Cheat Sheet (Who couldn’t use more customers?)
- Convert Your Phone into a Pro Video Camera Cheat Sheet (Learn how to create pro quality videos using nothing more than your smartphone.)
- Ultimate YouTube SEO Cheat Sheet. (It shows you 22 proven practices to get your videos ranking at the top of YouTube search listings.)
There’s no telling how long the company will be offering these bonuses worth more than $1,365. They could also take away the 25% discount for new members. If you are on the fence and not sure if this is something you need, why not grab the free 14-day trial and give the software a test drive?
That’s what I did, and I’m glad I did. I am now a member.
Here Are a Few Vidnami Examples
Would you like to see some examples of what you can do with this text to video software? Take a lot at these videos that only took me a few minutes to create.
Vidnami Review Wrap-Up
How do I feel about this product? I love it. I’m not going to sugarcoat my opinion here. Anyone can enjoy a free trial offer. I certainly did. By the second day of using the Vidnami text to speech app I was creating videos in minutes that ranked in Google for the keywords I was targeting.
And the bonus package is absolutely incredible. I’m glad I got on board while they were still giving out more than $1,365 in quality bonus content absolutely free.
I’m so pleased with this software that I have been paying a monthly membership fee ever since my free trial expired. I use Vidnami for YouTube affiliate marketing. You can too. Just add a link to your affiliate offers in your video descriptions. I also turn plr articles into videos. That’s right, I don’t have to write anything. I just create videos from plr content.
Video engages your prospects like simple text never will. If you use videos in any stage of your marketing plan, I recommend checking out Vidnami. The 14-day trial is free, and you don’t have to register a credit card.
The video instruction is excellent. There’s plenty of support. You can find me in the Facebook group a few times a week. I use Vidnami all the time to convert articles to video for myself and my clients. You can use Vidnami videos to get traffic on YouTube, to post on your blog, or engage on social media.
With a 14-day free trial and no money on the line, what do you have to lose? The answer is nothing. Join me in the Vidnami community and start creating great looking videos in just a few minutes.
Exclusive Vidnami Bonus Offer From IMMozie.com


0 Comments